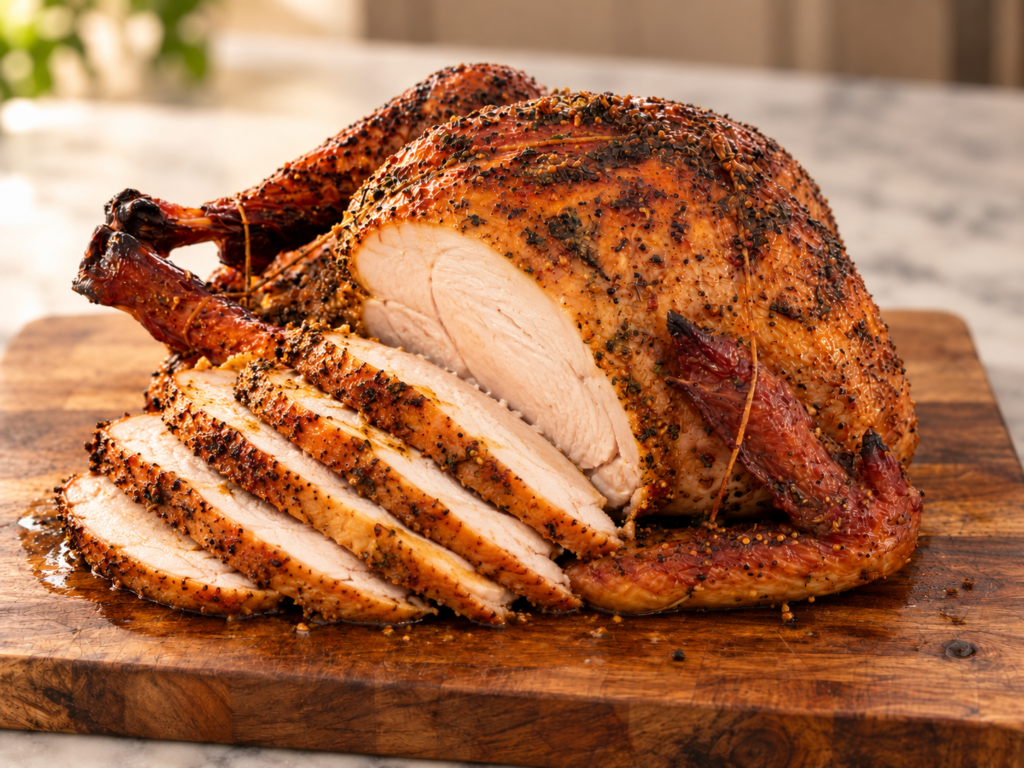
Smoking the Thanksgiving turkey sounds like a great idea—right up until you realize the entire holiday meal may depend on getting one very large piece of poultry right.
Fortunately, learning how to smoke a turkey on a pellet grill doesn’t have to mean babysitting a fire all day or cooking the bird at 225°F for eight hours.
For this cook, I’m using my Yoder Smokers YS640s pellet grill and ATBBQ’s Classic Holiday Turkey method. The turkey gets brined with apple, rosemary and sage, injected with butter, seasoned, then cooked hot enough to develop good skin before being finished with a sweet and savory glaze.
This is less of a traditional low-and-slow smoked turkey and more of a wood-fired pellet grill turkey—and for a whole Thanksgiving bird, I think that’s an important distinction.
Quick Answer: How to Smoke a Turkey on a Pellet Grill
For this pellet grill turkey, the basic process is:
- Brine the turkey overnight.
- Dry the skin thoroughly.
- Inject the breast with melted butter.
- Season and truss the turkey.
- Start the pellet grill at 450°F to begin browning the skin.
- Reduce the temperature to 325°F.
- Brush the turkey periodically with glaze.
- Cook until the turkey reaches a safe internal temperature.
- Rest before carving.
The ATBBQ Classic Holiday method combines the convenience and smoke of a pellet grill with roasting temperatures that are much better suited to turkey skin than an all-day 225°F cook.
That’s the approach I’m testing here.
Why I’m Cooking This Turkey on My Yoder YS640s
I’ve owned my Yoder Smokers YS640s for years, and a cook like this is exactly where a pellet grill makes sense.
Turkey doesn’t necessarily need hours of heavy smoke. What it needs is steady heat, controlled cooking and enough temperature to render the skin while keeping the breast from drying out.
A pellet grill gives me all three.
The Yoder also gives me plenty of room for a whole turkey on a rack and sheet pan without crowding the cooking chamber.
Instead of constantly managing charcoal or an offset fire while preparing the rest of Thanksgiving dinner, I can set the cooking temperature and concentrate on the turkey itself.
What I’m Using for This Turkey
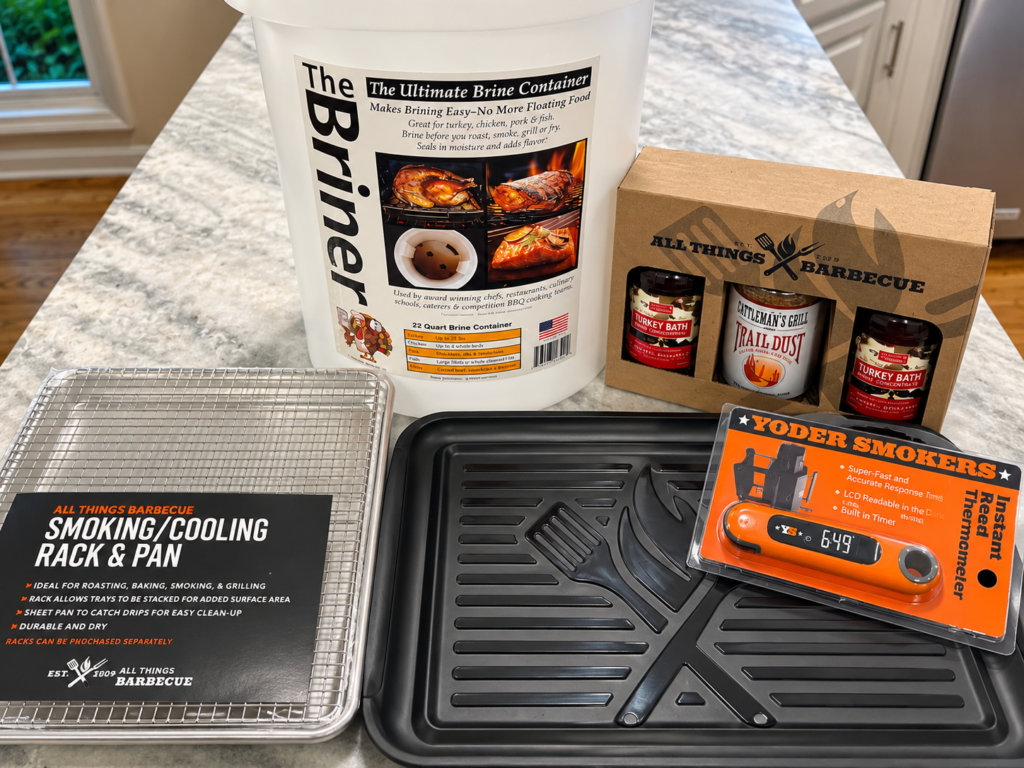
ATBBQ sent me its Classic Holiday Turkey Essentials Kit along with a Pan & Jerky Rack and Extra Large Stackable Prep & Serve Trays.
For the flavor side of the cook, the Classic Holiday combination uses:
- Sweetwater Spice Apple Rosemary Sage Brine
- Cattleman’s Grill Trail Dust All Purpose Seasoning
- Butter for injecting
- A butter-and-honey finishing glaze
The brine brings the traditional Thanksgiving flavors—apple, rosemary, sage and citrus—while Trail Dust adds garlic, herbs, pepper and savory seasoning.
Equipment
You’ll also want:
- Pellet grill or pellet smoker
- Brining bucket or food-safe brining container
- Wire rack and sheet pan
- Meat injector
- Butcher’s twine
- Instant-read or leave-in meat thermometer
- Small skillet or saucepan for the glaze
- Paper towels
- Large prep trays
Check out the ATBBQ Classic Holiday Turkey Essentials Kit
Step 1: Brine the Turkey
If you’re worried about dry turkey breast, this is probably the most important preparation step.
For the Classic Holiday Turkey, the brine is built around apple juice, salt, brown sugar, rosemary, sage, citrus and other seasonings.
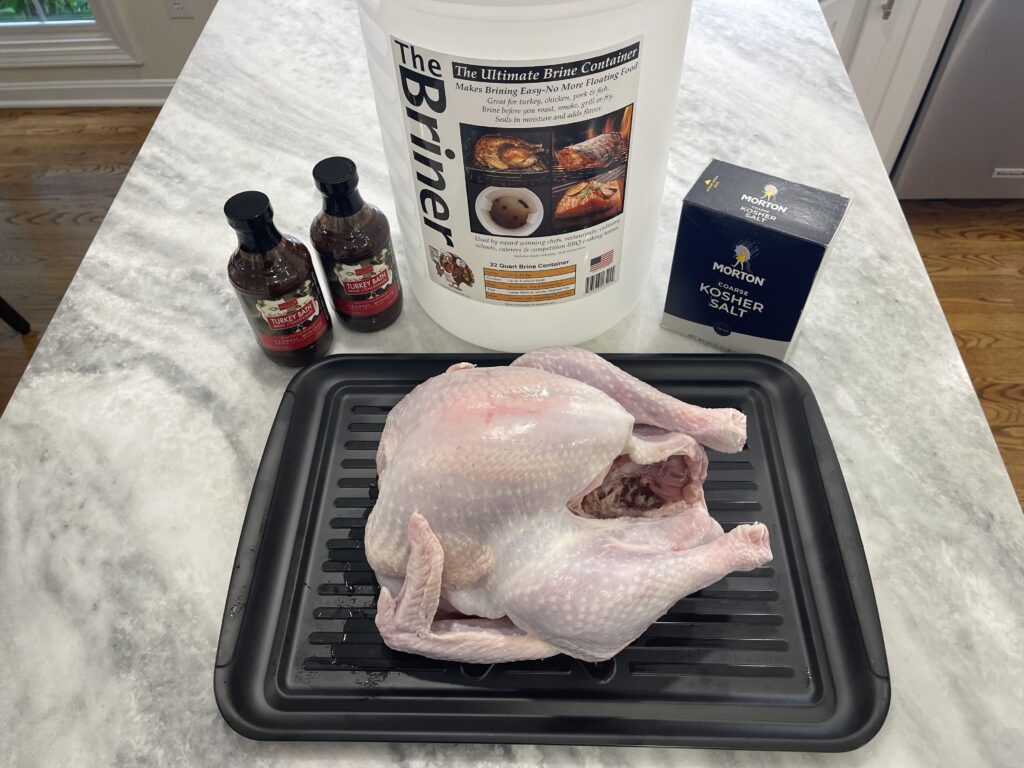
The ATBBQ recipe calls for combining the brine concentrate with kosher salt and cold water and keeping the turkey completely submerged. Their recipe recommends roughly 1 to 1½ hours of brining per pound, which puts a typical holiday turkey in the overnight range.
Keep the turkey refrigerated throughout the brining process.
One thing I like about using a real briner bucket instead of a stockpot is the plate that holds the turkey below the surface. There’s no trying to balance a plate or bowl on top of the bird to keep part of the breast from floating above the brine.
Briner Bucket I Use: Briner Bucket 22qt
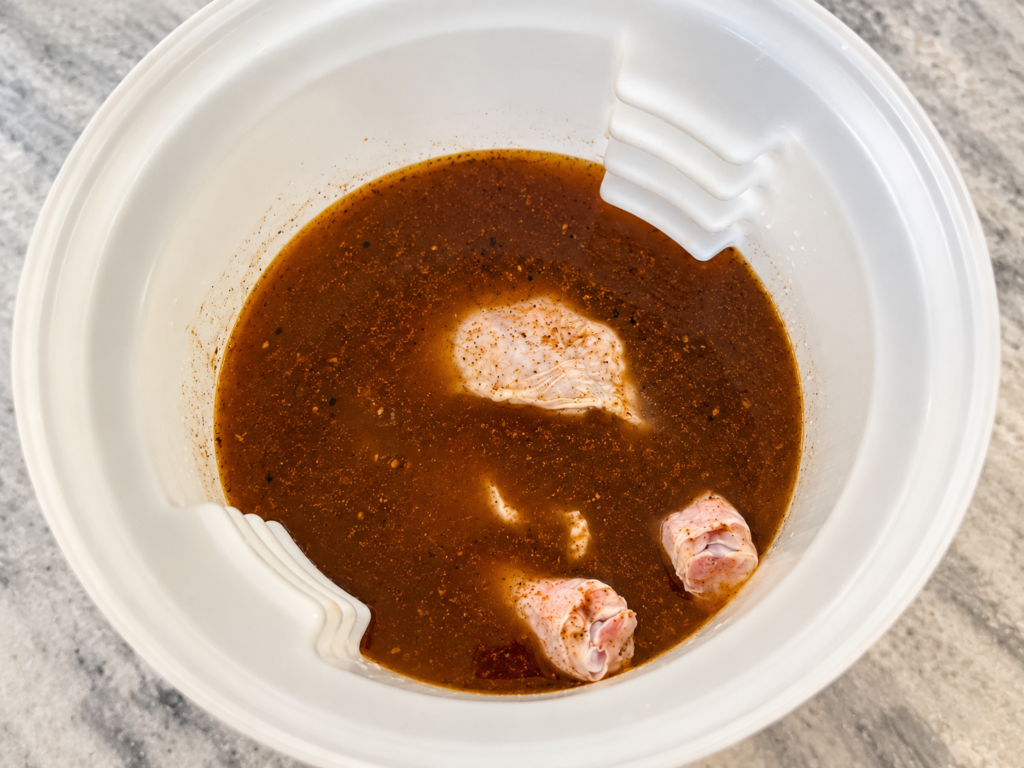
Step 2: Dry the Turkey Before It Goes on the Pellet Grill
When the turkey comes out of the brine, pat it thoroughly dry with paper towels.
Then place it uncovered on a wire rack over a sheet pan in the refrigerator.
This drying step matters because wet turkey skin and crispy turkey skin don’t mix.
The refrigerator helps remove surface moisture while air can circulate around the bird. If your schedule allows it, giving the turkey several hours—or ideally overnight—to dry is worth the extra planning.
This is also one reason I wouldn’t start this recipe Thanksgiving morning.
The better plan is to begin the turkey preparation a day or two before you actually need to serve it.
My Turkey Timeline
For a Thanksgiving meal, a simple schedule looks like this:
Two days before: Thaw completely if necessary and begin brining.
Day before: Remove from brine, pat dry the turkey and refrigerate uncovered.
Thanksgiving Day: Inject, season, truss and cook.
That takes most of the stressful prep work out of Thanksgiving morning.
Step 3: Inject the Turkey With Butter
Once the skin is dry, melt unsalted butter and allow it to cool enough to safely handle.
Load the butter into a meat injector and inject it into several areas of each breast rather than putting a huge amount in one location.
The goal isn’t to turn the turkey into a butter balloon.
You’re trying to distribute additional richness and moisture through the lean breast meat.
Insert the needle deeply, slowly press the plunger and gradually withdraw the needle while injecting. That helps distribute the butter instead of creating one large pocket.
Some butter may escape through the injection holes. That’s normal.
Meat Injector I Use: Pistol Grip Meat Injector.
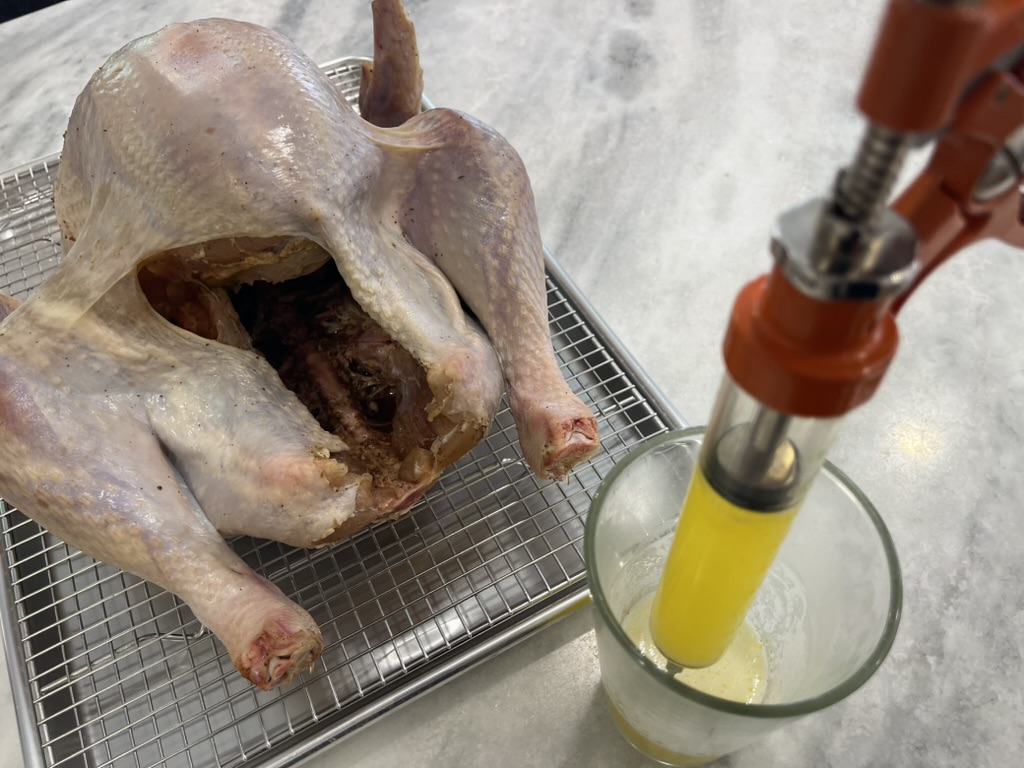
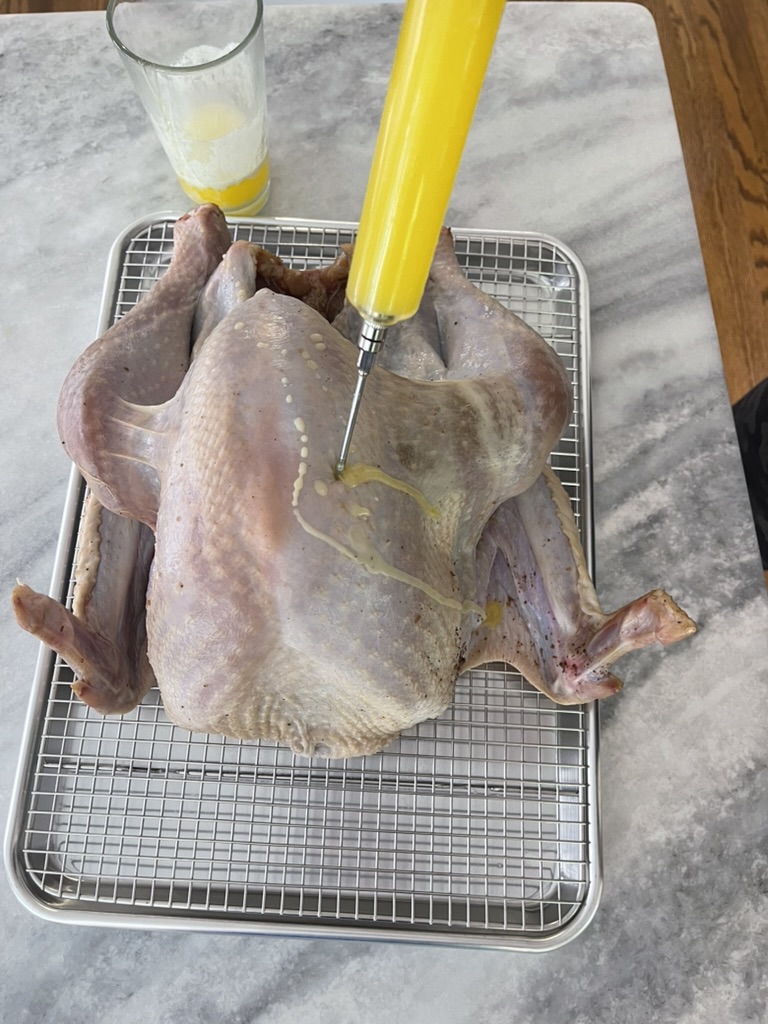
Step 4: Season and Truss the Turkey
After injecting, coat the outside of the turkey lightly with the remaining butter and season the entire surface.
I’m using Cattleman’s Grill Trail Dust All Purpose Seasoning, which is the seasoning paired with the Classic Holiday Turkey kit.
Make sure you reach the sides of the breast, legs and areas around the wings rather than seasoning only what you can see from directly above.
Next, truss the turkey with butcher’s twine.
For a whole presentation bird, trussing keeps the legs and wings tucked neatly against the body and gives you a much cleaner-looking finished turkey.
This is also the point where I’ll transfer the turkey to the rack and pan I’ll use on the smoker.
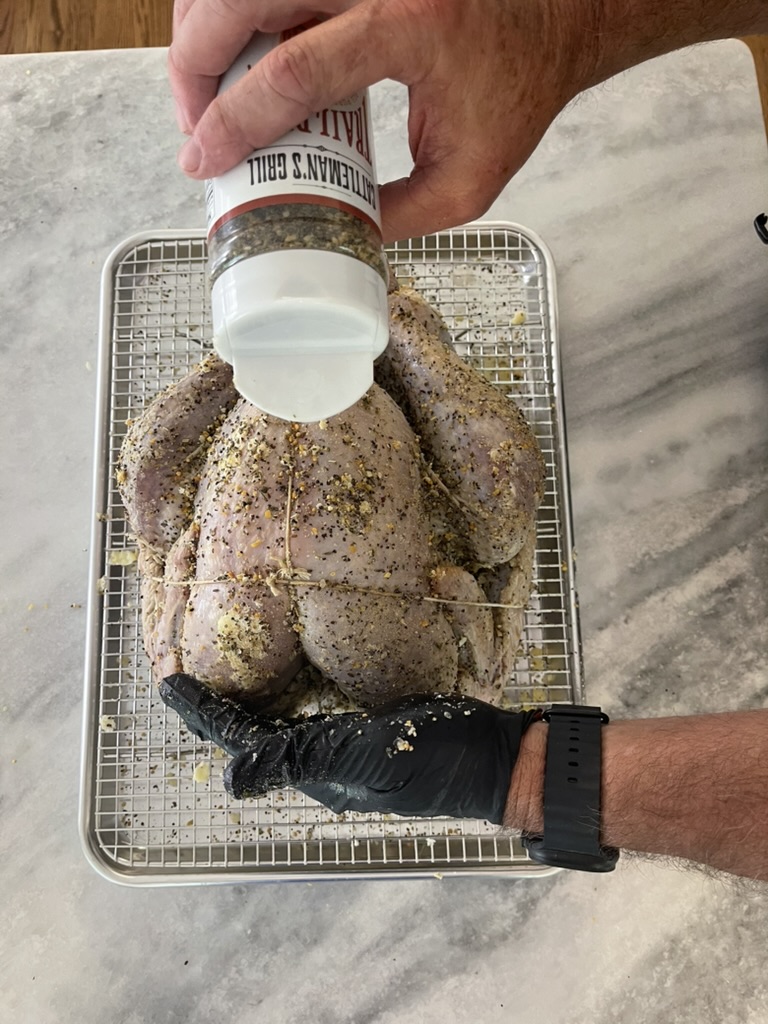
Step 5: Smoke the Turkey on the Pellet Grill
Here’s where this recipe differs from many smoked turkey recipes.
We’re not starting at 225°F.
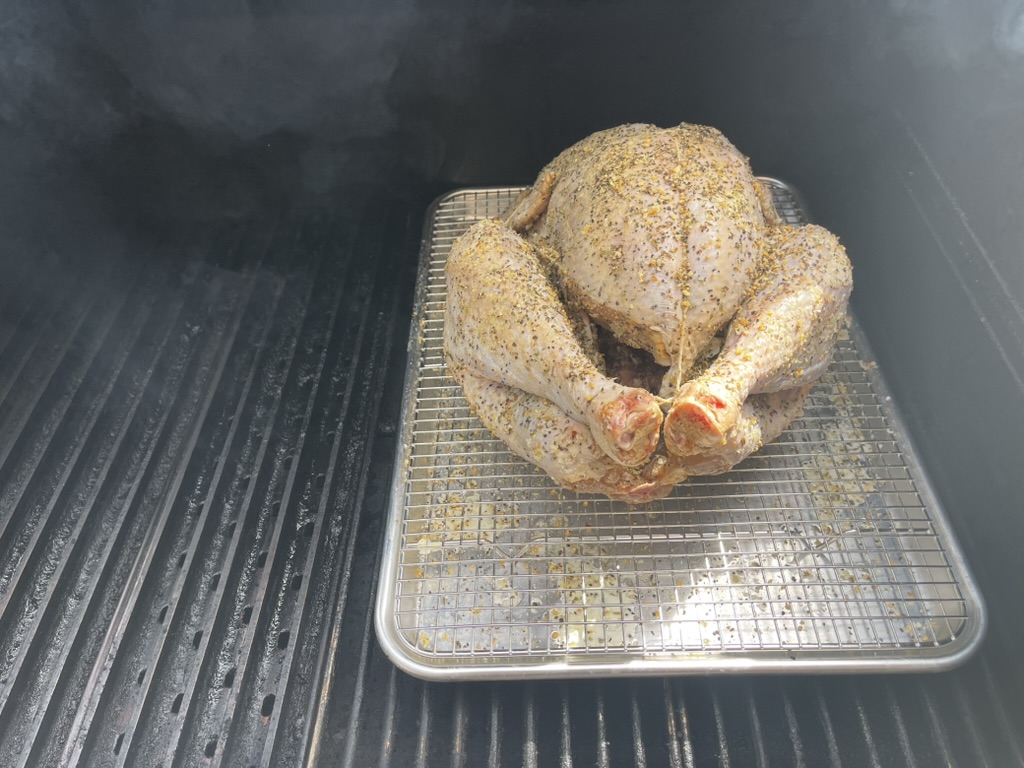
I’ll preheat the Yoder YS640s to 450°F with the diffuser in place for indirect cooking.
The turkey goes onto the pellet grill on the wire rack and pan with water and cooks at 450°F for approximately 45 minutes.
That initial blast of heat begins rendering the skin and develops the golden color you actually want on a holiday turkey.
After the initial cook, reduce the pellet grill temperature to 325°F.
This combination gives you smoke from the pellet grill without sacrificing the skin simply to maximize smoke exposure.
What Pellets Are Best for Turkey?
Turkey works especially well with mild to medium hardwood smoke.
Apple and cherry are obvious choices. Pecan is another good option if you want slightly richer smoke flavor.
A balanced hardwood blend works perfectly well too.
I wouldn’t obsess over pellet selection for this particular recipe. Because the turkey is cooking at relatively high temperatures, the smoke profile should be more subtle than a pork shoulder or brisket cooked low and slow.
If you want a deeper look at poultry woods, see my guide to Best Wood for Smoking Chicken: Apple, Cherry, Pecan & More.
Here’s my article on wood selection: Best Wood for Smoking Chicken
You want to keep pellets dry before a long holiday cook. Here’s my article for Best Wood Pellet Storage Containers.
Step 6: Make and Apply the Holiday Glaze
While the turkey begins cooking, prepare the glaze.
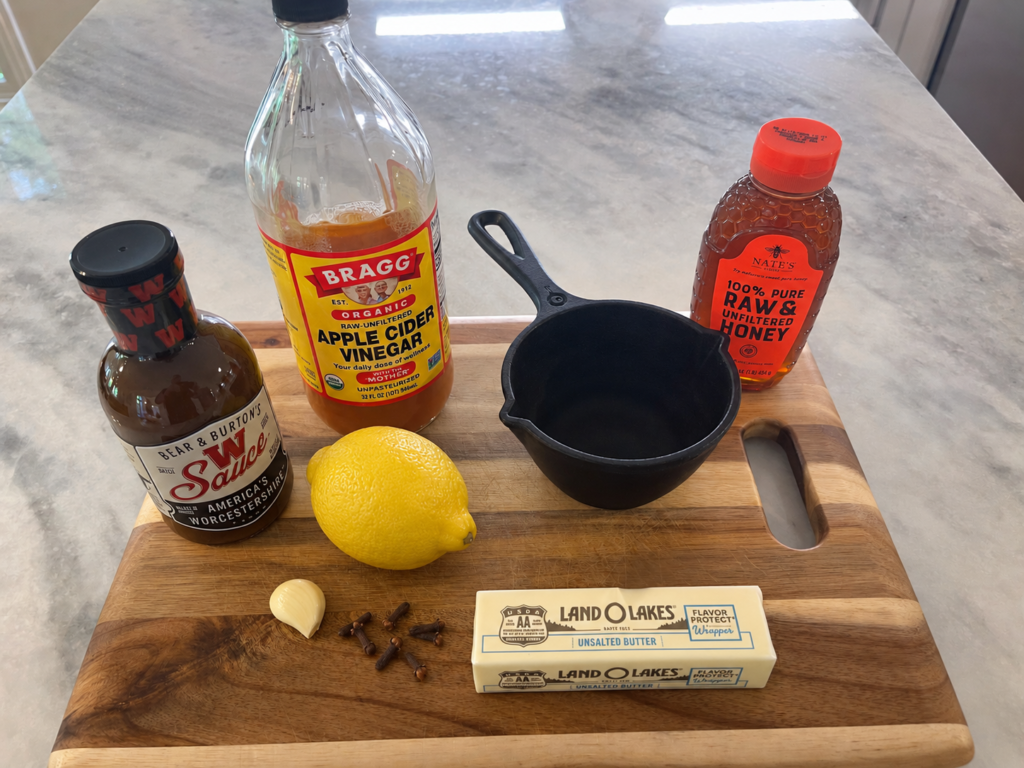
The Classic Holiday glaze combines:
- Unsalted butter
- Honey
- Lemon zest
- Apple cider vinegar
- Worcestershire sauce
- Garlic
- Whole cloves
It’s a good combination for turkey because you’re getting richness from the butter, sweetness from the honey, acid from the vinegar and lemon, and a little savory depth from Worcestershire and garlic.
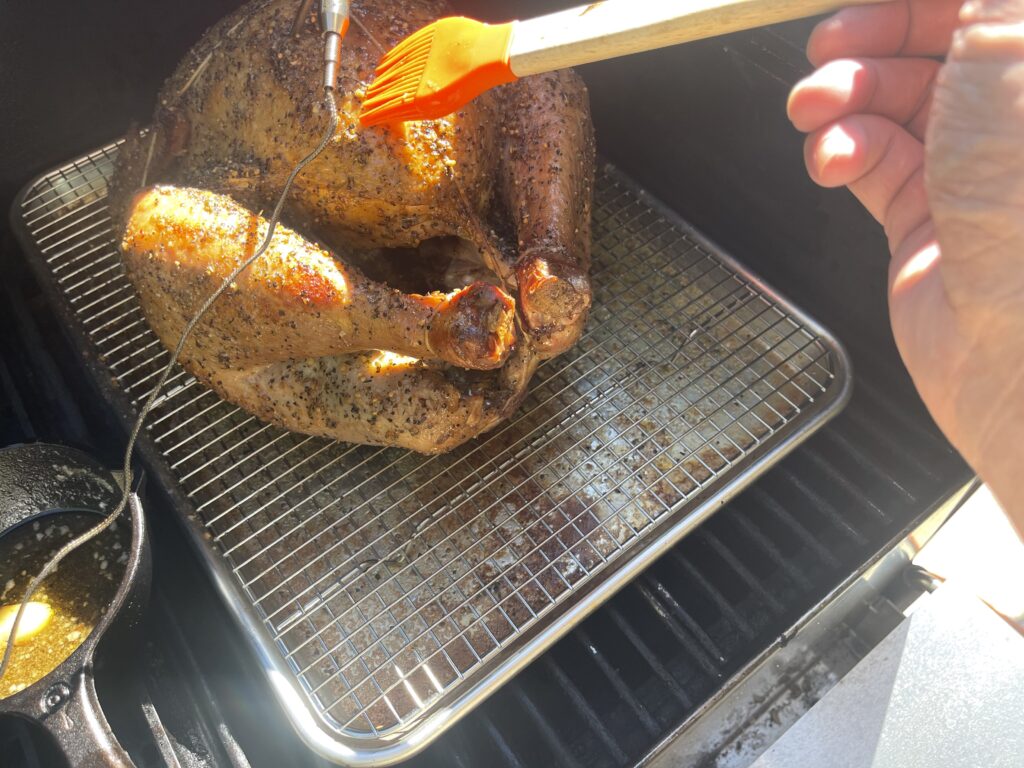
After the first 45 minutes, reduce the grill to 325°F and brush the turkey with the glaze.
Continue glazing periodically as the bird finishes.
You don’t need to coat it every ten minutes.
Opening the pellet grill constantly dumps heat and makes your cooking time less predictable. About every 45 minutes is plenty.
How Long Does It Take to Smoke a Turkey on a Pellet Grill?
This is one of the most common questions about pellet grill turkey, but internal temperature matters more than cooking time.
Turkey size, starting temperature, weather, grill recovery and even the shape of the bird can change your total cook time.
For a turkey around 12–14 pounds using this higher-temperature method, I would budget roughly 3 to 4 hours, plus resting time.
But I would never schedule Thanksgiving dinner based solely on a minutes-per-pound formula.
Use your thermometer.
Turkey Internal Temperature
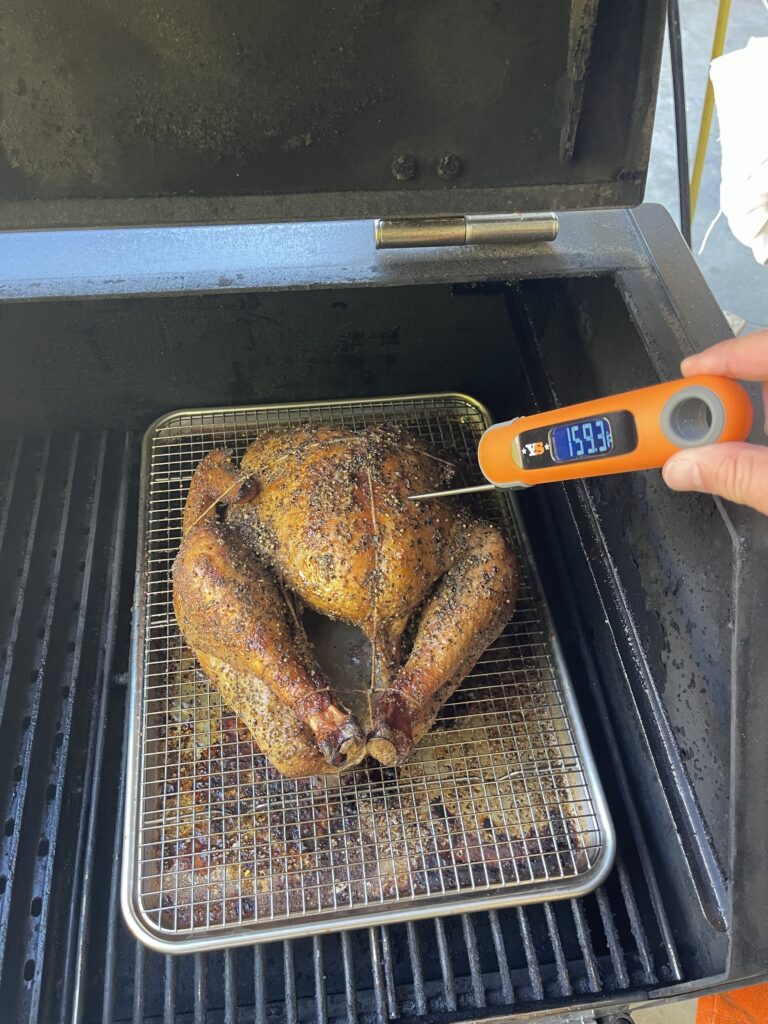
USDA guidance calls for whole turkey to reach a minimum internal temperature of 165°F measured in the thickest part of the breast and the innermost portions of the thigh and wing.
Don’t allow the temperature probe to touch bone.
I like using a leave-in probe during the cook and then confirming several locations with a good instant-read thermometer before calling the turkey finished.
Rest the Turkey Before Carving
Once the turkey reaches its safe finishing temperature, remove it from the pellet grill and let it rest before carving.
Give it around 20–30 minutes.
Resting makes the turkey easier to carve and gives the juices inside the meat time to redistribute instead of immediately running across the cutting board.
And don’t panic if Thanksgiving dinner isn’t served the second the turkey comes off the grill.
A whole bird holds heat surprisingly well.
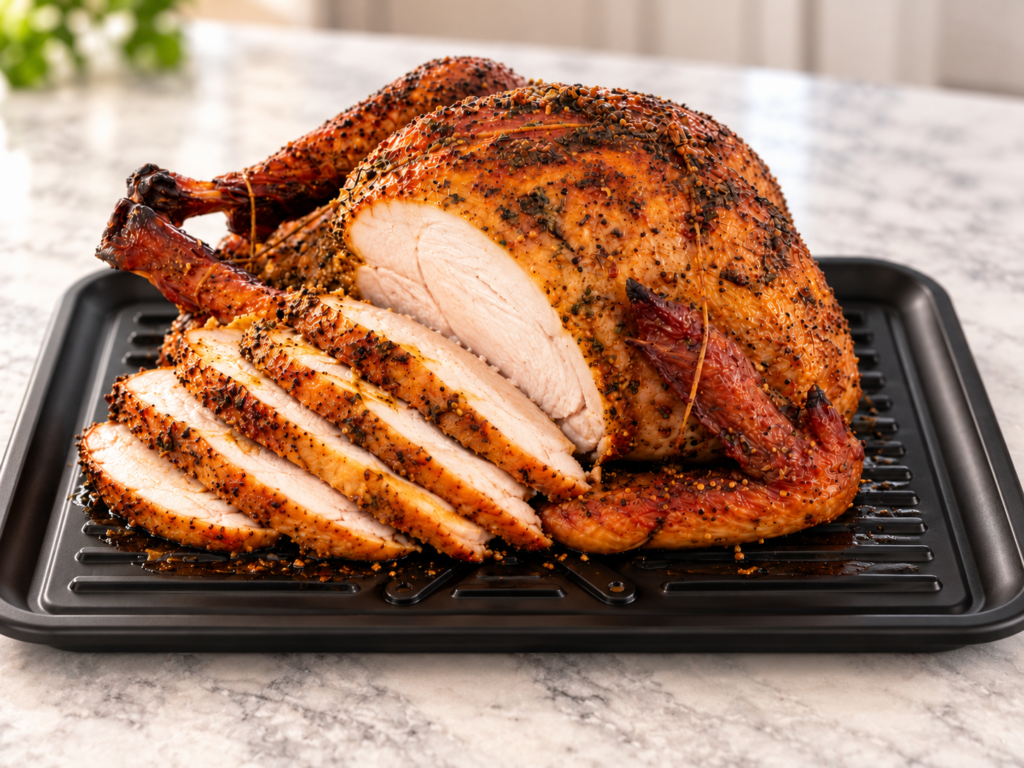
My Results: Was the ATBBQ Classic Holiday Turkey Worth It?
My turkey for this cook weighed 12.5 pounds.
The total cooking time on my Yoder YS640s was 3 hours and 30 minutes.
After carving it, here’s what stood out:
Skin: Needed couple of hours more drying time.
Breast moisture: Juiciest Turkey I’ve EVER had!
Smoke flavor: Mild – hints of smoke
Seasoning/brine: Spot on!
Glaze: Perfect.. may want to increase the honey
Would I use this method again? Definitely!
The cook went seamless! I’m going to use this same technique on all my turkeys. The seasoning and juiciness was over the top great!
What I Would Do Differently Next Time
Possible things to change:
Did the bird need more or less drying time? More – couple hours
Was the glaze sweet enough? No – would 1/3 cup Honey
Pellet flavor… pure perfection!
I would use the rack and pan again.
Is the ATBBQ Classic Holiday Turkey Kit Necessary?
Yes!
What the kit does is eliminate much of the guesswork.
Instead of building a brine and trying to decide which rub works with it, the flavor profile has already been paired around classic holiday ingredients such as apple, rosemary, sage, garlic and herbs.
For someone smoking their first Thanksgiving turkey—or someone who simply doesn’t want another recipe-shopping project the week of Thanksgiving—I can see the appeal.
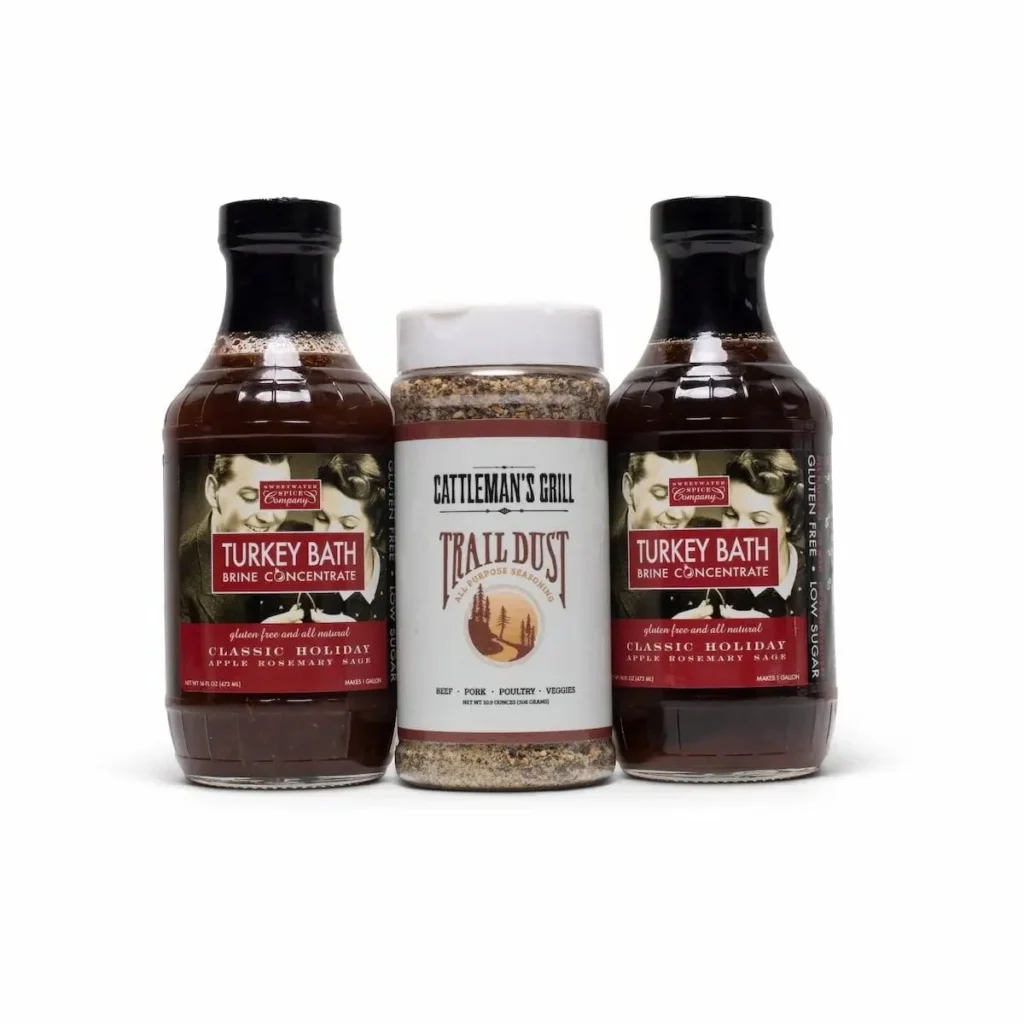
Classic Holiday Flavor Turkey Kit link here.
Pellet Grill Turkey FAQ
What temperature should I smoke a turkey on a pellet grill?
For this recipe, I start the pellet grill at 450°F for approximately 45 minutes, then reduce it to 325°F for the remainder of the cook.
That higher-temperature approach helps the skin brown and render instead of remaining soft or rubbery.
Can you smoke a turkey at 225°F?
You can, but I don’t think low-and-slow is automatically better for poultry.
A turkey doesn’t need the same long rendering process as brisket or pork shoulder, and very low temperatures can make it harder to produce good skin.
For this Thanksgiving-style turkey, I’d rather use the pellet grill as a wood-fired outdoor oven and cook hotter.
How long should I brine a turkey?
The Classic Holiday recipe uses approximately 1 to 1½ hours per pound, generally putting a typical turkey in an overnight brine. Keep the turkey refrigerated while it brines.
Do I need to inject a turkey after brining it?
No, but they’re doing different jobs.
The brine seasons the meat and helps it retain moisture. The butter injection adds richness directly to the breast.
For this particular recipe, I’m doing both.
Should I stuff a turkey before smoking it?
I prefer cooking stuffing separately.
It simplifies the turkey cook and makes monitoring internal temperatures easier. USDA guidance also recommends cooking stuffing separately for optimum safety.
What wood pellets are best for smoked turkey?
Apple, cherry and pecan are all good choices.
For a traditional holiday flavor, I’d lean toward apple or a balanced hardwood blend rather than a very aggressive smoke profile.
How do you keep turkey from drying out on a pellet grill?
Start with a brine, monitor internal temperature carefully and don’t cook based purely on time.
The breast is usually the part most likely to dry out, which is another reason I’m using the butter injection in this recipe.
Final Thoughts
If you’re trying to figure out how to smoke a turkey on a pellet grill, don’t assume Thanksgiving turkey needs to become an all-day low-and-slow barbecue project.
The ATBBQ Classic Holiday method takes a different approach.
Brine the turkey for moisture and flavor. Dry the skin. Add butter to the breast. Season it well. Then use the pellet grill at roasting temperatures so you get wood-fired flavor without sacrificing the golden skin people expect from a Thanksgiving turkey.
And using my Yoder YS640s means I can do the entire cook outside while keeping the kitchen oven free for everything else competing for space on Thanksgiving Day.
That’s a pretty good argument for putting the turkey on the pellet grill in the first place.
I loved how this turkey turned out, and this method has officially earned the spot as the way I’ll cook my Thanksgiving turkey from now on. Here’s ATBBQ’s Version – HERE
Disclosure: ATBBQ provided the turkey products and accessories used for this cook. This article contains affiliate links, which may earn Backyard Smoke Lab a commission at no additional cost to you. All opinions and results are my own.
🔥 Shop BSL Favorites on Amazon!
📄 Get Free BBQ Recipes, Guides & Charts
👉Check out the list of BBQ Gear I recommend and use
🔥 Follow Backyard Smoke Lab for more BBQ tips, recipes, and reviews
📺 YouTube: https://www.youtube.com/@backyardsmokelab
📸 Instagram: https://www.instagram.com/backyardsmokelab
🎵 TikTok: https://www.tiktok.com/@backyardsmoklab
🌐 Website: https://backyardsmokelab.com